
You've set up your Askobo expert profile and now you want to sell something. Good. Here's the full walkthrough, from the dashboard to hitting publish.
Step 1: Start at the Dashboard
Log in and you'll land at app.askobo.com/expert. The Dashboard shows your total earnings, active clients, bookings, and a snapshot of your webinars, courses, and products. If you're new, everything reads zero. That's fine.
On the left sidebar, look under Business. Click Products.
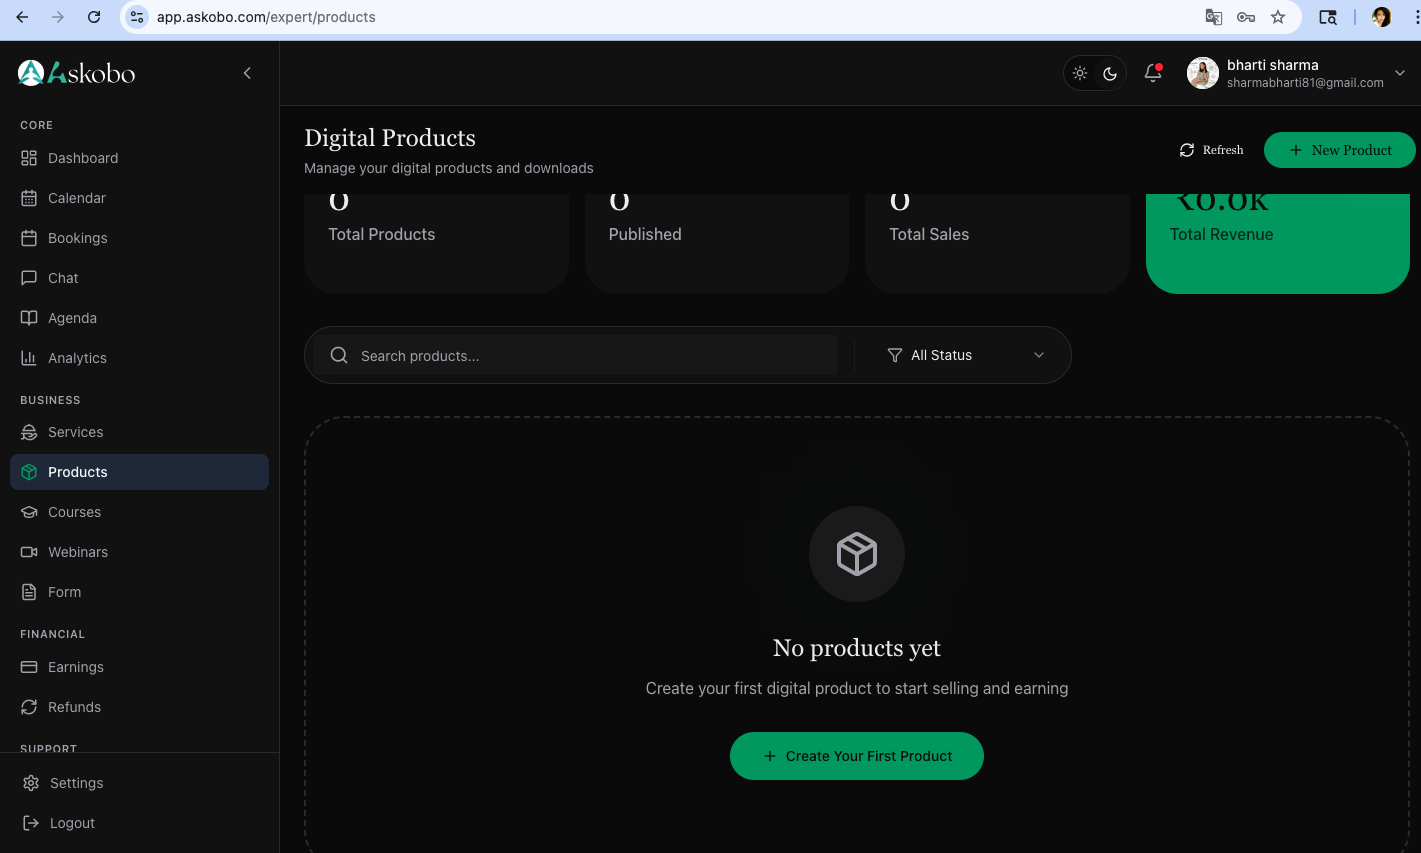
Step 2: The Digital Products Page
This page shows three numbers at the top — Total Products, Published, and Total Sales — then an empty state below with a big button that says + Create Your First Product. There's also a + New Product button in the top-right corner. Either one gets you to the same place.
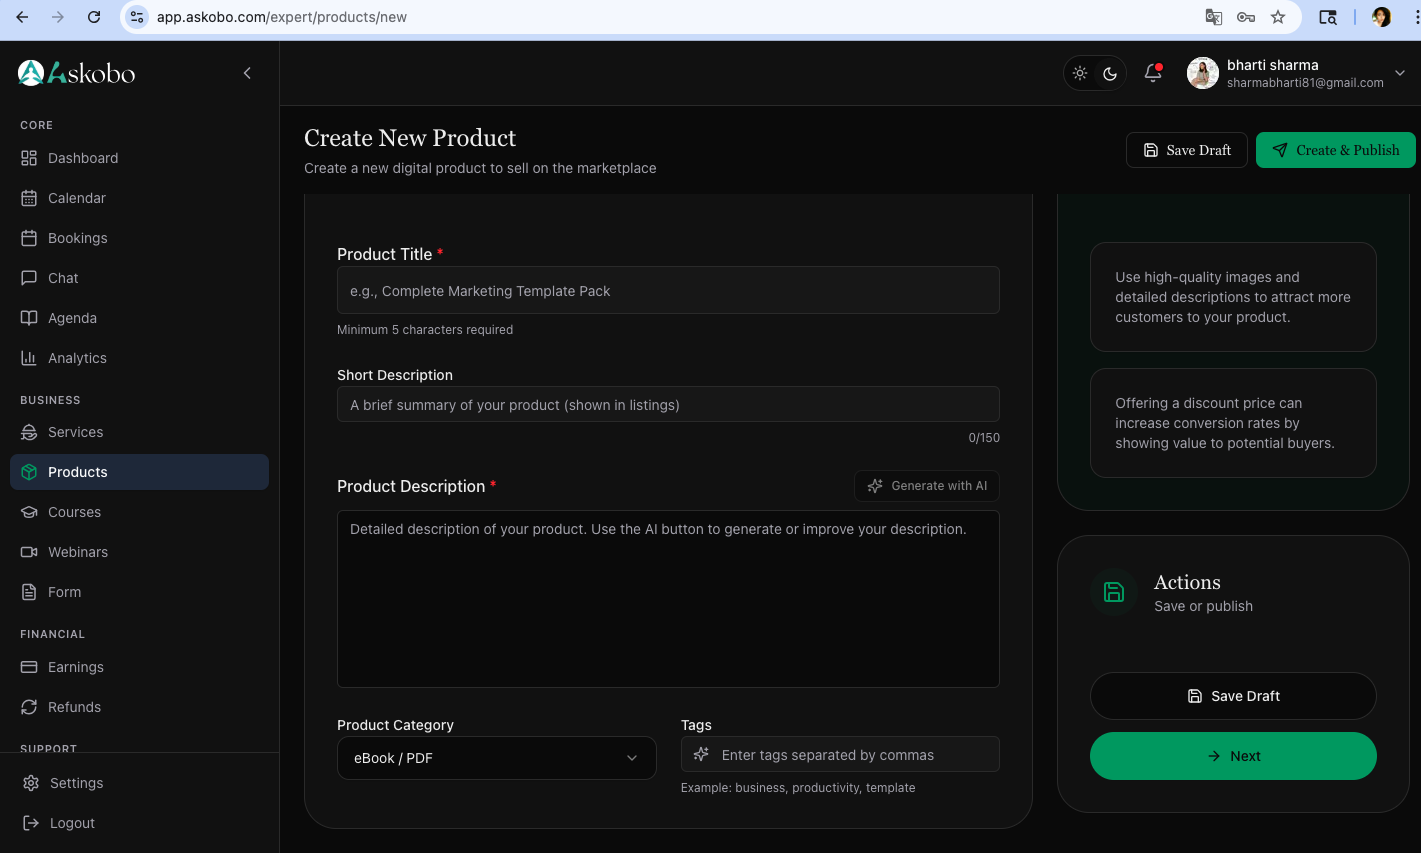
Step 3: Product Details — The Basics
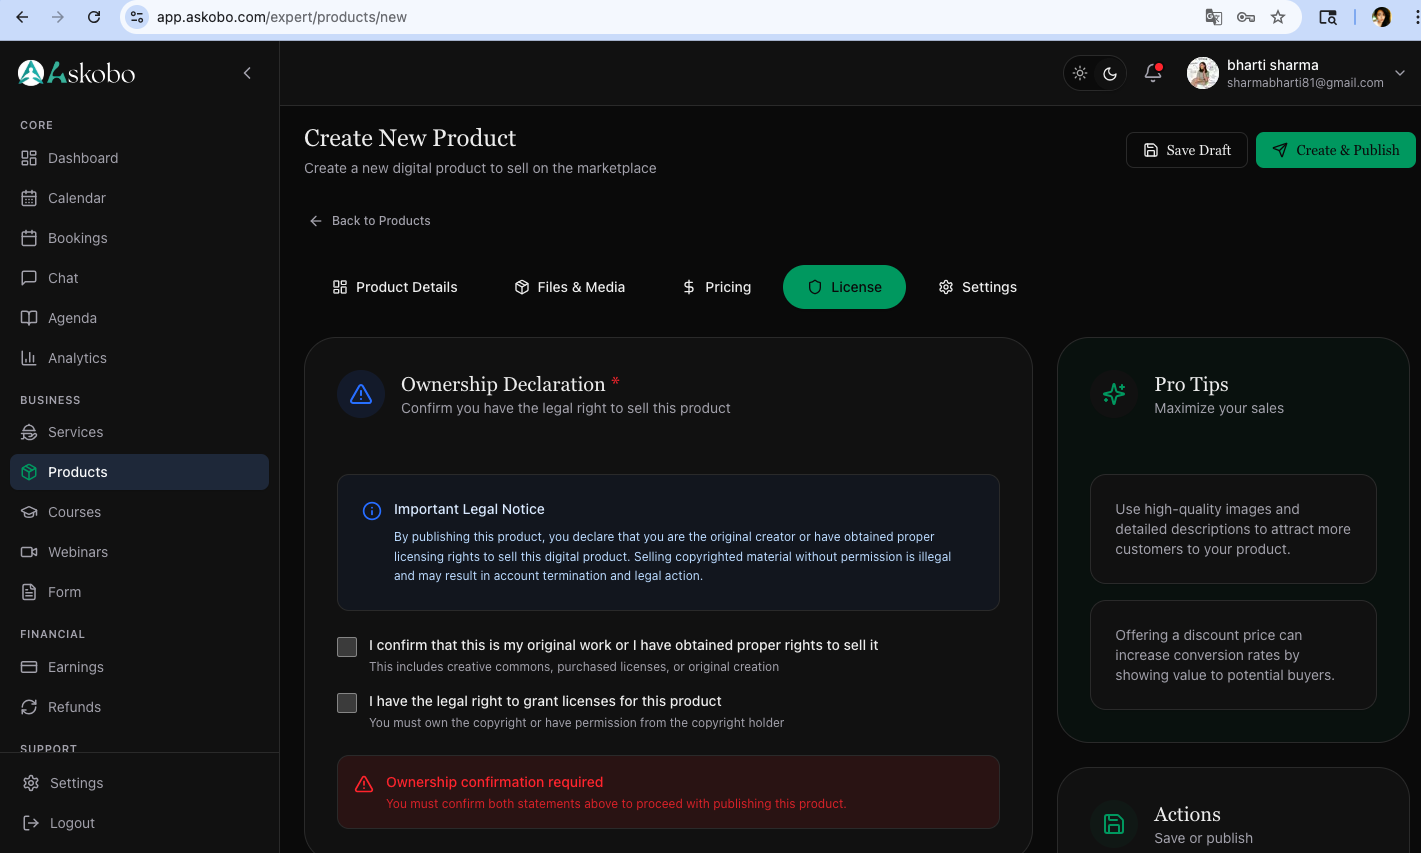
The creation form has five tabs across the top: Product Details, Files & Media, Pricing, License, and Settings. You start at Product Details.
Product Title is required and needs at least 5 characters. Be specific. "Freelance Invoice Template Pack" beats "My Templates" because buyers searching for solutions want to know exactly what they're getting before they click.
Short Description sits below that — 150 characters max, shown in listings. One sentence that explains who this is for and what it does.
Product Description is the longer version. There's a Generate with AI button next to the label. Use it if you're stuck on wording, but treat whatever it produces as a rough first pass. Edit it into your actual voice, because buyers can usually tell when they're reading something generic.
Product Category is a dropdown that defaults to "eBook / PDF." Change it to whatever actually fits. Next to it is Tags — enter keywords separated by commas. These affect how your product shows up in search, so think about what someone would type to find what you're selling.
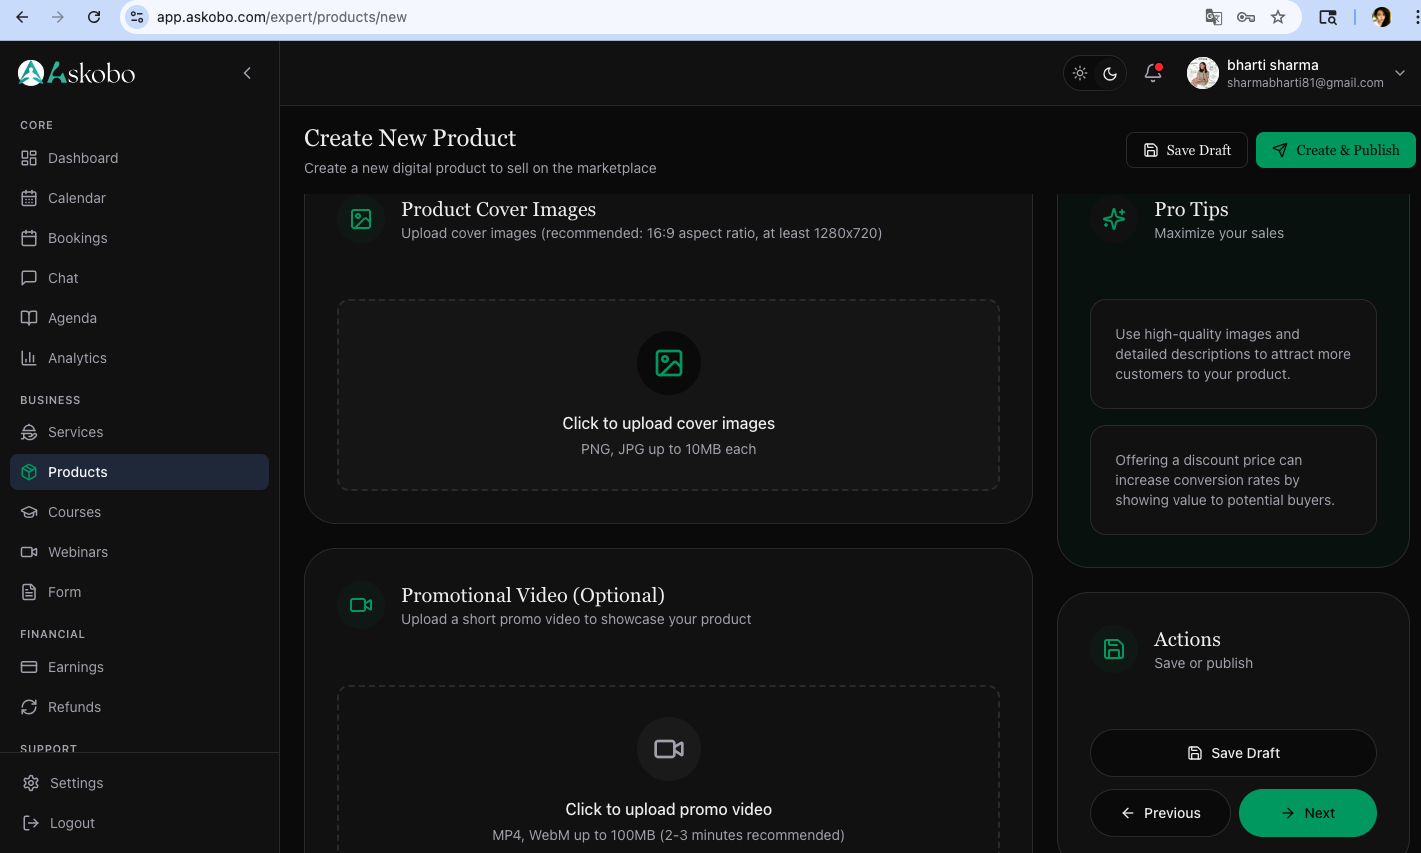
Step 4: Cover Images and Promo Video
Click Next to move to Files & Media, or click that tab directly.
Product Cover Images asks for PNG or JPG files, 16:9 aspect ratio, at least 1280×720, up to 10MB each. The first image you upload becomes the cover shown in listings. A clean, readable cover with a clear title will always outperform a cluttered one, even if the product underneath is the same.
Promotional Video (Optional) — MP4 or WebM, up to 100MB, with a note recommending 2–3 minutes. A short video showing what's inside your product can answer questions before buyers even have to ask them. It's not required, but if you have ten minutes to record a screen walkthrough, it's ten minutes well spent.
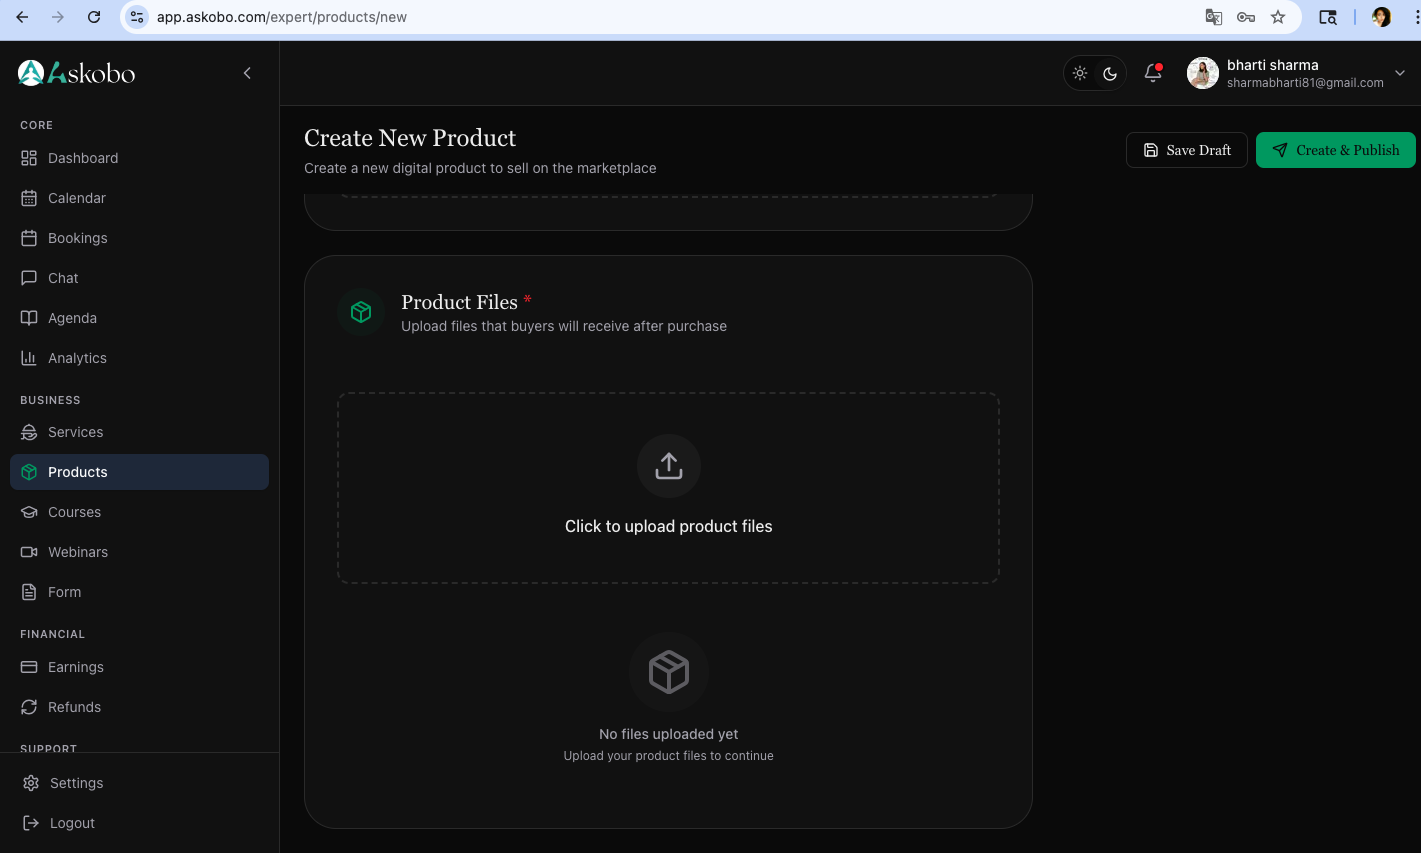
Step 5: Upload the Actual Product Files
Still on Files & Media, scroll down to Product Files. This one is required. The upload area says "Upload your product files to continue" — that's literal. You can't proceed without uploading something here.
Drop in whatever buyers will receive after purchase: PDFs, templates, spreadsheets, zip archives. Once files are uploaded, you're cleared to move on.
Step 6: Pricing
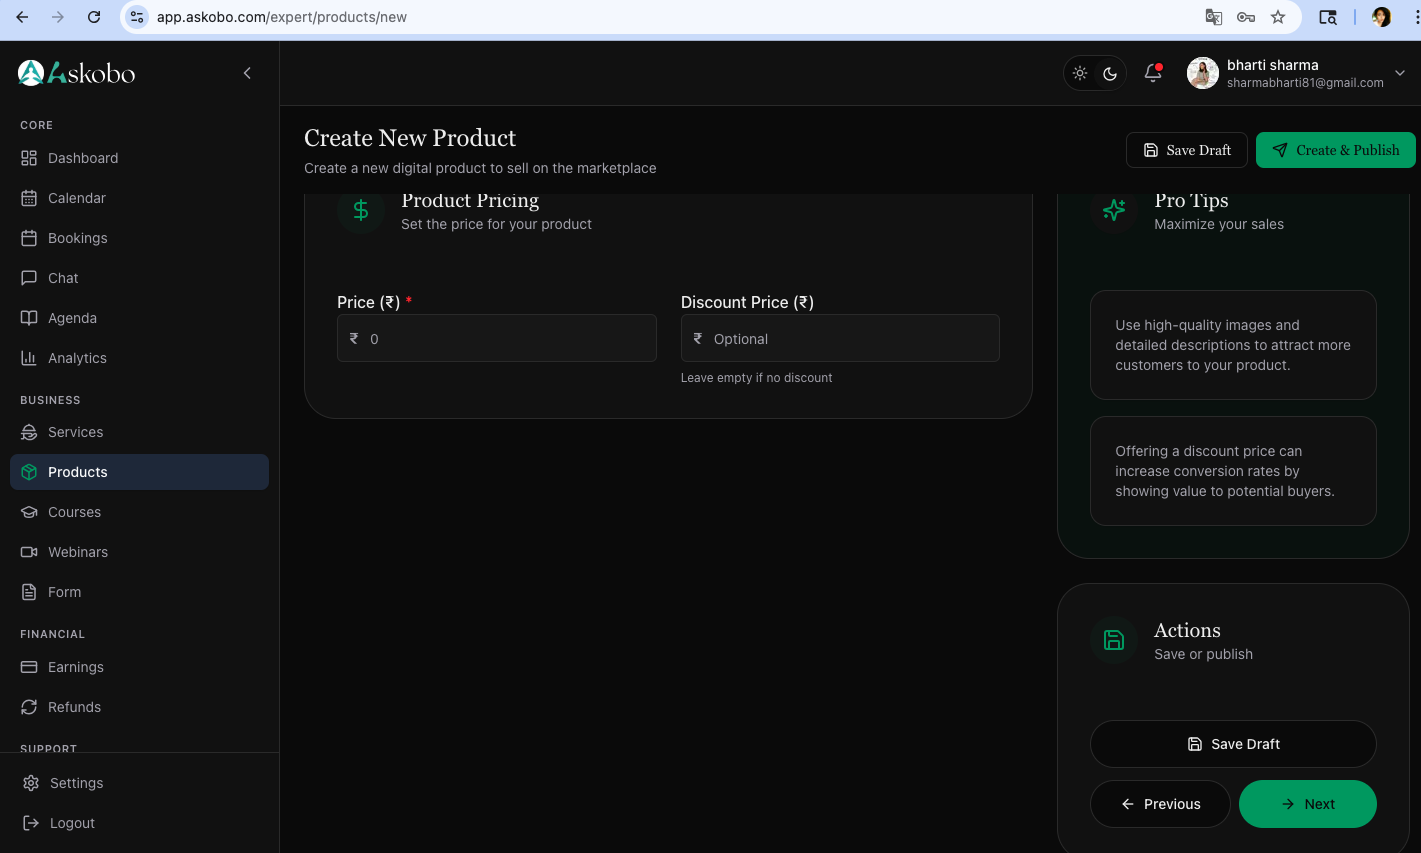
The Pricing tab has two fields: Price (₹) and Discount Price (₹).
Price is required. Discount price is optional. If you leave the discount field empty, buyers just see one price. If you fill it in with a lower number, they'll see both, with the original price crossed out. The platform itself notes that this tends to increase conversions. Whether you use it or not is up to you, but it's there.
Step 7: Ownership Declaration and License
The License tab covers two things.
Ownership Declaration has two checkboxes — one confirming this is your original work or that you have the rights to sell it, and one confirming you can legally grant licenses. Both need to be checked. If they're not, an orange warning appears: "Ownership confirmation required." The platform will not let you publish until you check them.
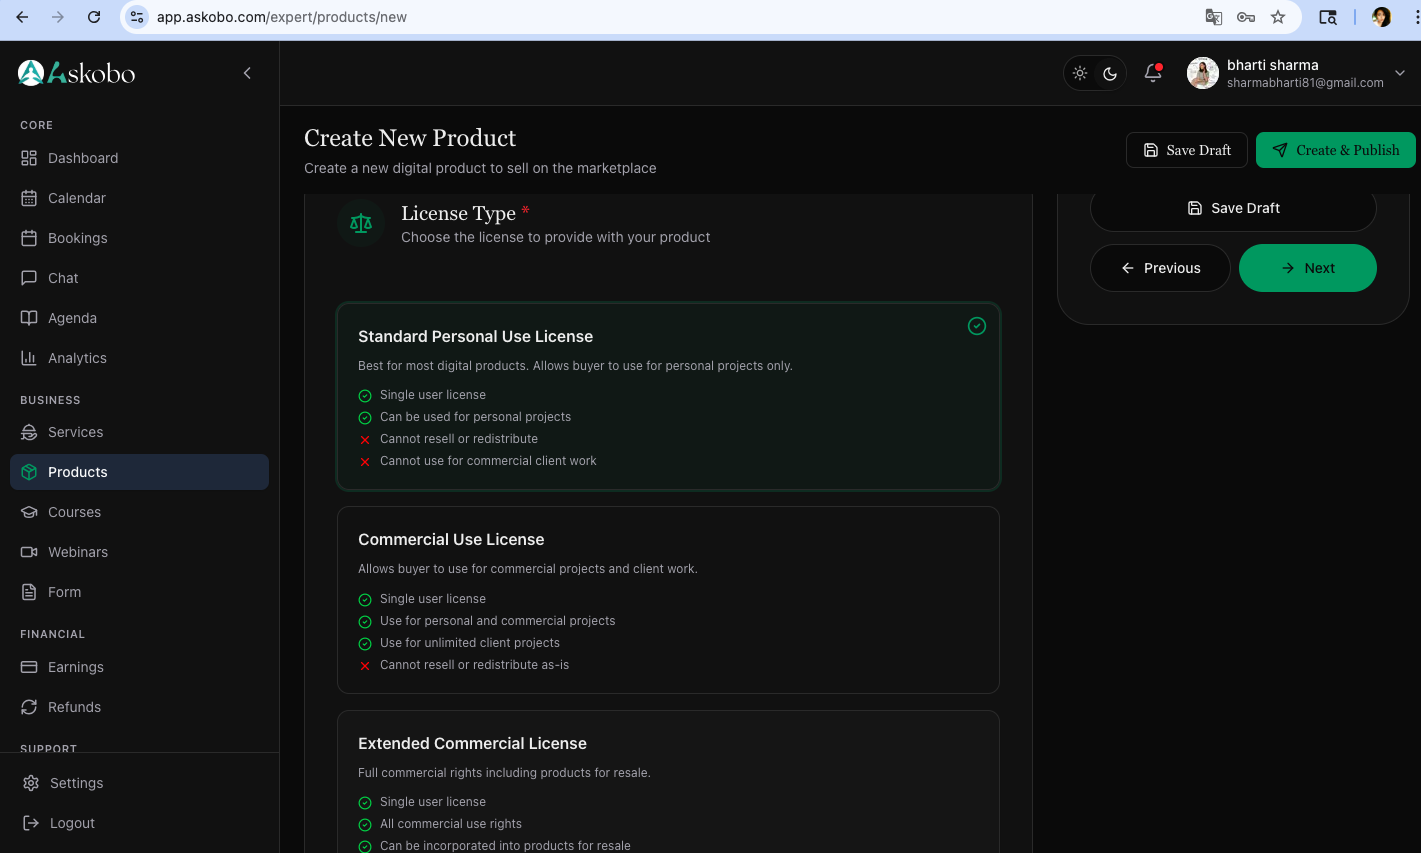
License Type has three choices:
- Standard Personal Use License — Single user, personal projects only. Cannot resell or use for commercial client work.
- Commercial Use License — Single user, personal and commercial projects, unlimited client work. Still can't resell as-is.
- Extended Commercial License — Full commercial rights, including resale.
Step 8: Delivery Settings and Refund Policy
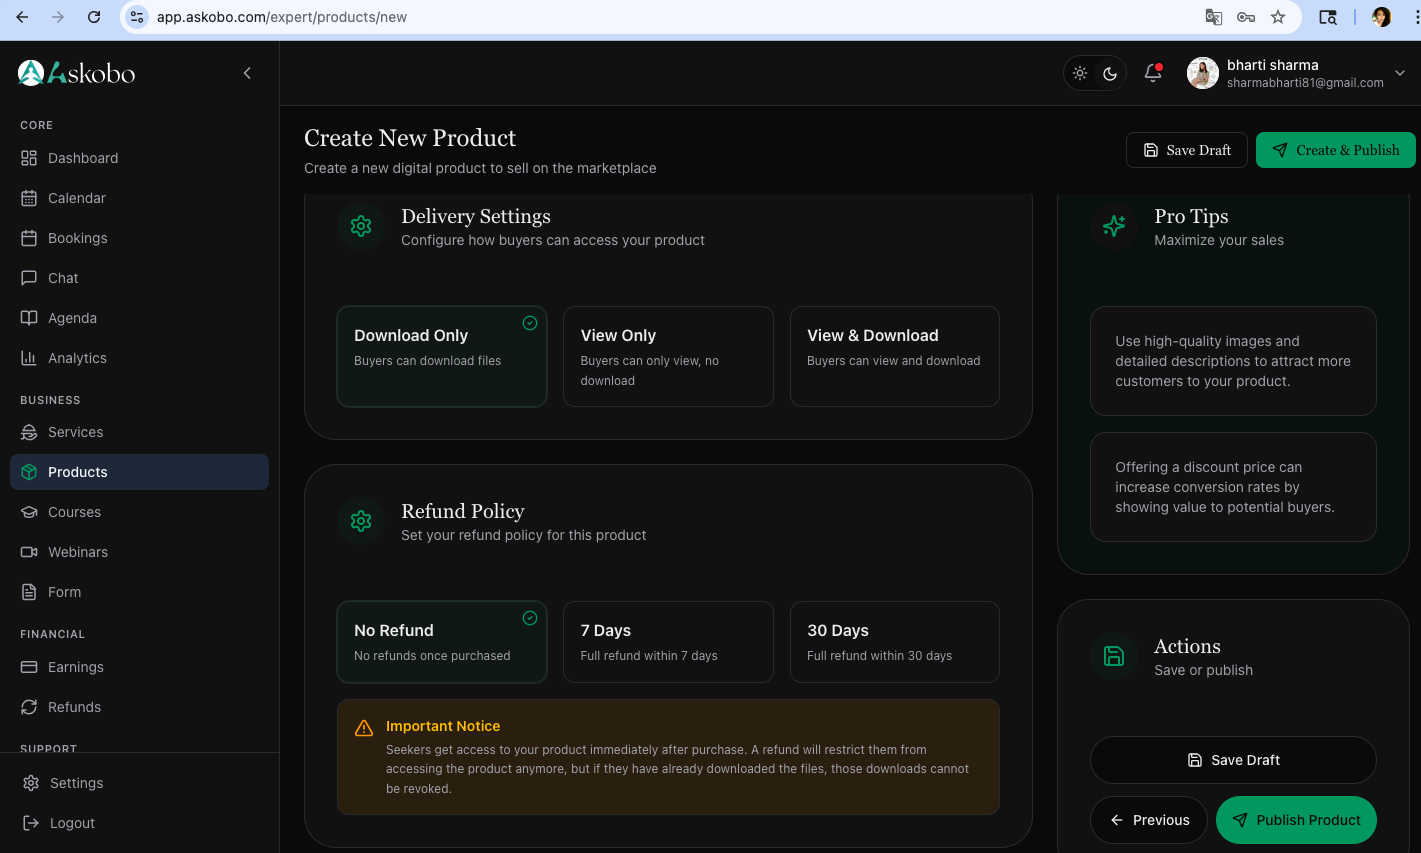
The last tab is Settings.
Delivery Settings gives you three options: Download Only, View Only, or View & Download. For most digital products, Download Only is the right call.
Refund Policy has three options: No Refund, 7 Days, or 30 Days. Read the yellow notice on this page carefully before you pick one. Buyers get access immediately after purchase. If you issue a refund, their access is revoked — but if they've already downloaded the files, those downloads cannot be taken back. That's just how digital products work. Decide your policy with that reality in mind.
Step 9: Save Draft or Publish
There's a Save Draft button on every step. Use it. Don't let a browser hiccup erase a description you spent twenty minutes writing.
When everything is filled in, click Create & Publish at the top-right, or the Publish Product button at the bottom of the Settings tab. Your product will appear on the Digital Products page with an Active badge on it.
A Couple of Things to Know Before You Start
The form is not a one-way door. You can go back with the Previous button or jump between tabs by clicking the tab labels at the top. Nothing locks in until you publish.
If you're planning to create more than one product, settle on a format early: consistent image dimensions, a title structure that follows the same pattern, a description length you can actually maintain. It makes your catalog look like someone put thought into it rather than uploaded things in a rush.
One last thing: the platform puts Pro Tips on the right side throughout the form. A few of them are actually useful. The one about discount pricing is real. The one about high-quality images is real. They're worth glancing at on your first pass.
Now go upload something.